As a beginner, rotate a simple skull-and-jaw form before you place any features, then keep the character's defining shapes the same in the front, three-quarter, and profile views. If your style bends realistic perspective on purpose, use construction rules that fit that design. Draw the three views together.
What changes when you draw the same manga face at different angles?
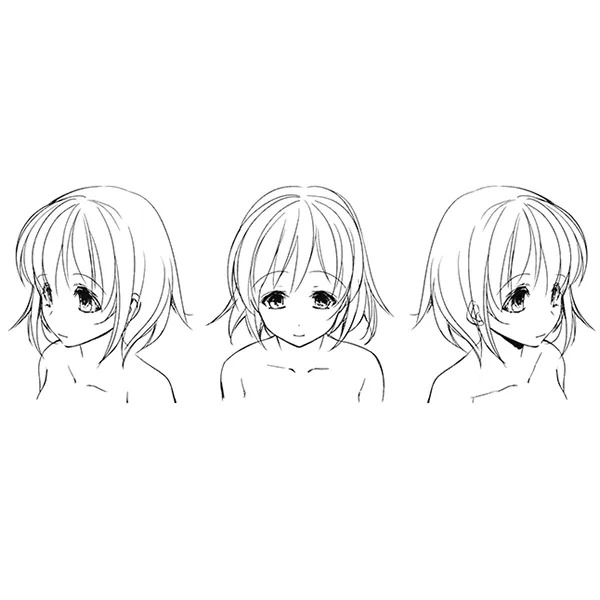
A character's face changes shape on the page as the head turns. The front view shows both sides of the face. A three-quarter view reveals more of one side. A profile puts the forehead, nose, lips, and chin into a single visible contour. The challenge is making all three drawings look like one person.
An original manga character has a short, pointed chin, wide upper eyelids, and asymmetrical bangs that fall toward one eyebrow. From the front, you see both eyes and the bangs clearly. Turn the head and the farther eye takes up less space, the jaw contour changes, and the bangs follow the rounded forehead. In profile, the nose and chin become part of the outer silhouette.
| Part of the face | Front view | Three-quarter view | Profile |
|---|---|---|---|
| Head shape | Both sides visible | One side more prominent | Side plane dominant |
| Centerline | Near the middle of the face | Curved toward the turned side | Near the visible facial edge |
| Eyes | Both broadly visible | Near and far eyes differ | Far eye hidden |
| Nose and mouth | Mostly frontal shapes | Following the angled facial plane | Part of the side contour |
| Ear | At the sides of the head | One ear more visible | On the visible side plane |
| Jaw and chin | Balanced outline | Near and far contours differ | Lower profile silhouette |
| Hair | Framing the front of the skull | Bangs and volume turning with the head | Side silhouette of the hairstyle |
The three-quarter view shows the change most clearly because both the front and side surfaces contribute to the drawing.
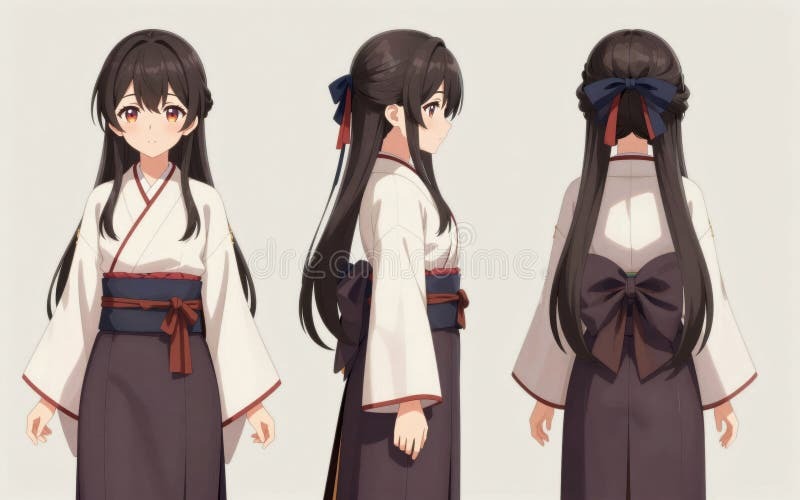
Compare the silhouettes of the three versions before you look at the eyelashes or mouth. The pointed chin should still look deliberate, the upper eyelid should keep its character, and the bangs should belong to the same hairstyle. Matching every stroke would erase the changes that make the turn convincing.
Build a head that can turn: skull, side plane, and curved guides
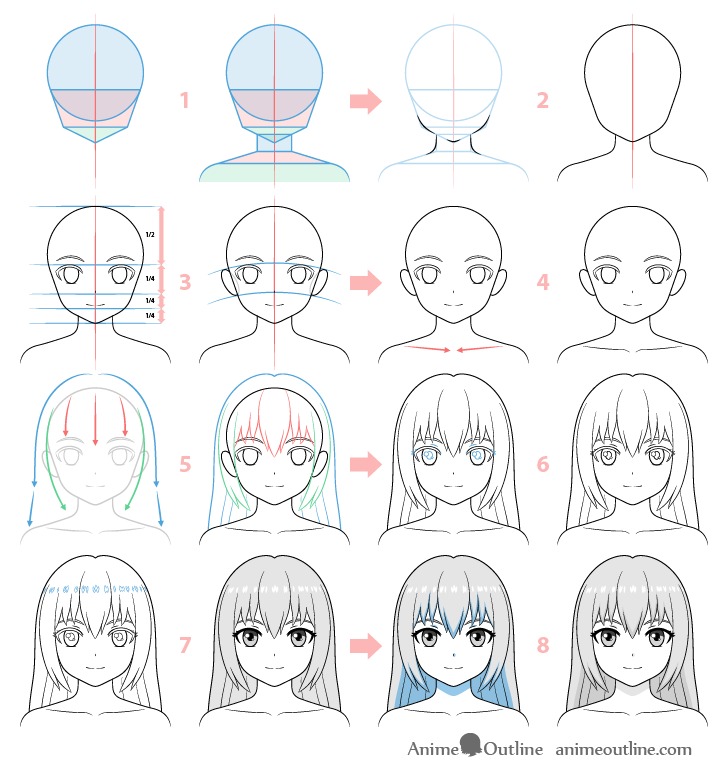
Start with a simplified solid head: a rounded skull, a visible side plane, and an attached jaw. This gives the facial features a surface to follow when you rotate the drawing.
This construction is related to the Loomis-derived approach taught in Proko's head-drawing lesson. It's a flexible guide for manga, whose stylized proportions differ from the realistic head used to introduce the method.
Establish the skull and side plane
Sketch a light circle for the upper head. Add a curved oval on the side to suggest the flattened side plane of the skull. When the head faces forward, that plane is less prominent. As the head turns toward profile, the oval opens wider in the drawing. Near a direct side view, you see the plane almost face-on.
Think about volume first. Sliding an oval toward one edge of a frontal face outline doesn't turn the head. Change the direction the head faces, or the construction stays flat.
Attach the jaw beneath the skull. It should face the same way as the upper head, with the chin sitting along the direction the front of the face points.
Wrap the facial guides around the form
Draw a centerline from the upper head toward the chin. On a front-facing head, it sits close to the middle of the visible face. On a turned head, it curves across the rounded surface.
Add a second curved guide for the brows and eyes. It crosses the centerline and follows the direction the face points.
In r/BeginnerArtists, a learner states the difficulty plainly: “I struggle to visualise the face turning in 3D, especially when drawing from different angles.”
A useful starting exercise is an unfinished three-quarter head with no eyes, nose, mouth, or hair. Build the skull, mark the side plane, attach the jaw, and add the two curved guides. If the jaw points in a different direction from the centerline, fix the structure while the drawing is still simple.
Turn the face from front to three-quarter view
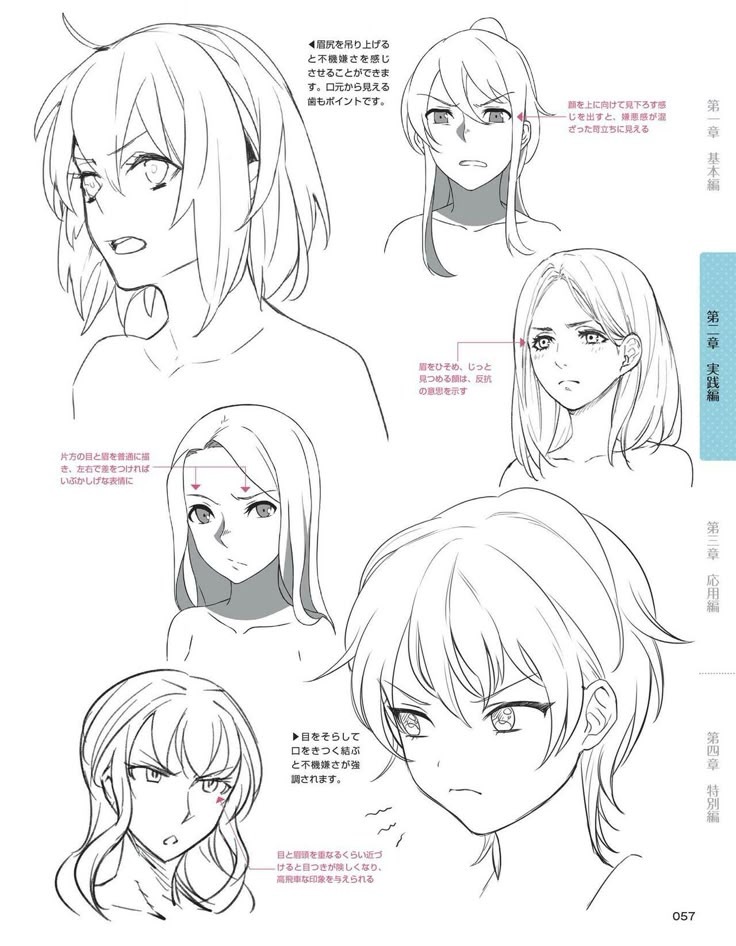
To turn a manga face into a three-quarter view, rotate the front plane of the head and let the facial features follow it. The near side becomes more visible. The far side takes up less of the drawing and overlaps with the nose or cheek contour.
One r/learntodraw poster puts it this way: “I can easily draw front view but right when i try to do a 3/4 view it comes out horribly…”
Start from the frontal construction of the example character, keeping its eye design, chin shape, and broad head proportions in mind.
Introduce a slight turn
Rotate the skull enough to reveal more of the side plane. For a head facing right on the page, the cheek on the left side of your sketch is nearer and fuller, while the right-side cheek looks narrower. Move the centerline around the form so it stays on the front surface.
At this intermediate angle, the jaw, nose, and mouth start following the same new direction as the centerline. Both eyes stay visible, but the far eye already has less frontal surface.
Complete the three-quarter view
Keep rotating until the side plane is more evident. The nearer eye has more visible frontal space, while the farther eye and eyebrow are compressed by perspective or partially concealed.
AnimeOutline's three-quarter-face demonstration uses a curved centerline and shows the far side of the face getting narrower. How much it narrows varies with the character's design and the angle, so there's no fraction to copy.
The near cheek and jaw take on different contours too. A chin connected to the centerline looks more coherent than one placed from the old frontal outline.
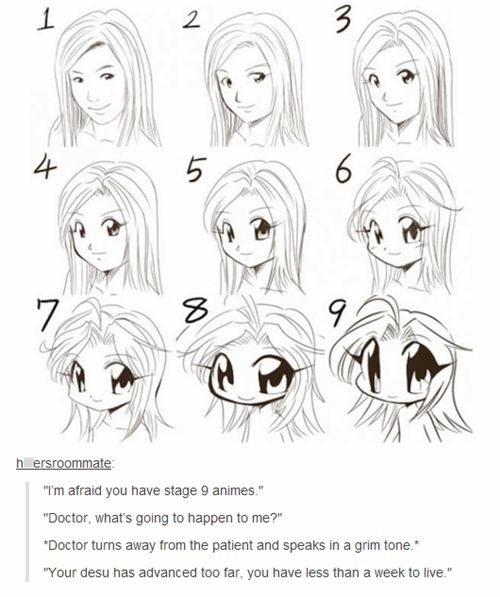
On the example character, keep the wide upper eyelid on both sides. The far eye looks narrower but carries the same eyelid design.
Trace the centerline and eye guide over your finished three-quarter sketch. The nose, chin, and far eye should all respond to that same rotation.
Draw the side profile without flattening the face
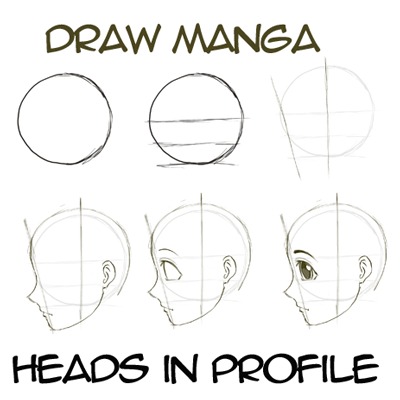
A side profile continues the same head rotation until the visible outline of the forehead, nose, mouth, and chin forms the front of the face.
Begin with the skull and side plane from the earlier construction. As the front plane turns away, the visible side of the head dominates. The jaw still belongs to the skull: connect it below the side plane and lead it toward the chin.
In Proko's Loomis-derived side-view example, a circle represents the flattened side plane of the skull. At an oblique angle, its outline looks more oval.
Keep the example character's profile
Return to the example character's pointed chin and its nose treatment. The forehead, nose bridge, lips, and chin now form one continuous side contour.
Manga can simplify the outline a great deal, but each feature still needs a coherent position on the same head. A small stylized nose works perfectly well if it belongs to the character's established design.
The visible ear sits on the side plane, back from the facial contour, and helps explain the transition from face to skull. The jaw runs beneath that region toward the chin, and the neck supports the head from below.
Near full profile, the far eye and far cheek disappear behind the facial contour.
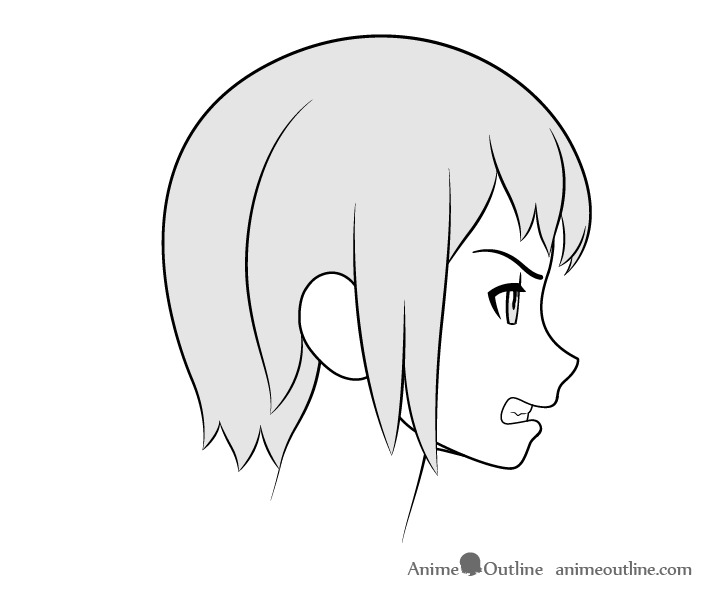
Look at the negative space around the nose, lips, and chin, then compare the ear-to-jaw connection against the character's side reference. If the ear looks attached to the cheek or the jaw hangs beneath the skull, go back to the underlying head planes before you finish the profile.
Keep the character recognizable in every view
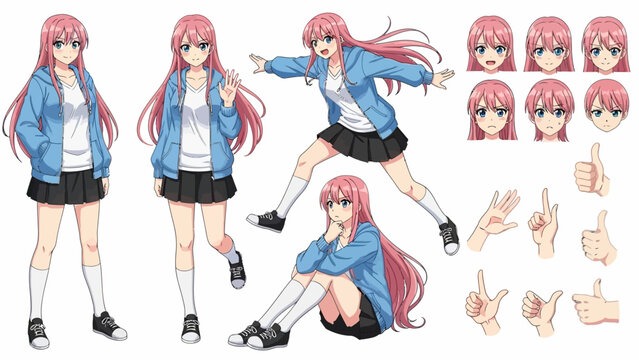
A convincing head turn keeps the character's design while perspective transforms its visible shapes.
That's a separate problem from drawing a structurally plausible head. You can produce a clean front view and a clean profile that look like two different characters.
An artist practicing anime faces described the issue on r/learntodraw: “The difference is even greater when i try to draw them from different angles”.
Identify the features that belong to the character
For the example character, the recognizable traits are the pointed chin, the wide upper eyelid, and the asymmetrical bangs.
These are design choices. Another character might have a rounder chin, narrower eyes, a distinct nose, or a different arrangement of hair.
| Character cue | Front view | Three-quarter view | Profile |
|---|---|---|---|
| Pointed chin | Sits central and symmetrical | Shifts with the centerline | Defines the lower silhouette |
| Wide upper eyelid | Shows on both eyes | Stays within the altered near and far eye shapes | Shows in the visible eye design |
| Asymmetrical bangs | Fall toward one brow | Turn around the forehead | Keep their side mass |
| Nose treatment | Reads as a simplified frontal mark | Follows the angled facial plane | Becomes part of the profile contour |
A consistent design doesn't require mathematically identical visible feature sizes.
Compare the drawings as a model sheet
Place the front, three-quarter, and profile heads side by side at about the same scale. A model sheet makes unintended changes easier to see because the three drawings share a visible reference.
Watch the character's silhouette and the relationships between features. A profile with a newly rounded chin can be geometrically sound and still inconsistent with the pointed design.
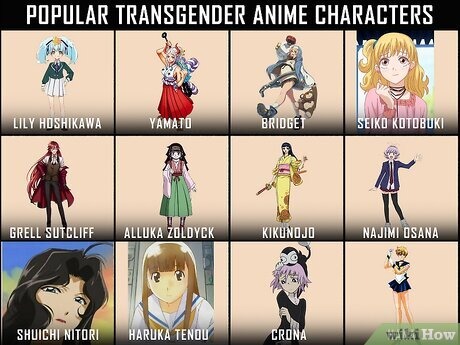
CLIP STUDIO TIPS describes using character sheets and reference tools to keep views consistent. The same idea works in a paper sketchbook.
Make a small three-view sheet for your character and find one trait that has changed unintentionally. Correct that feature and keep the intended stylization.
Make the head look up or down and turn the hair with it
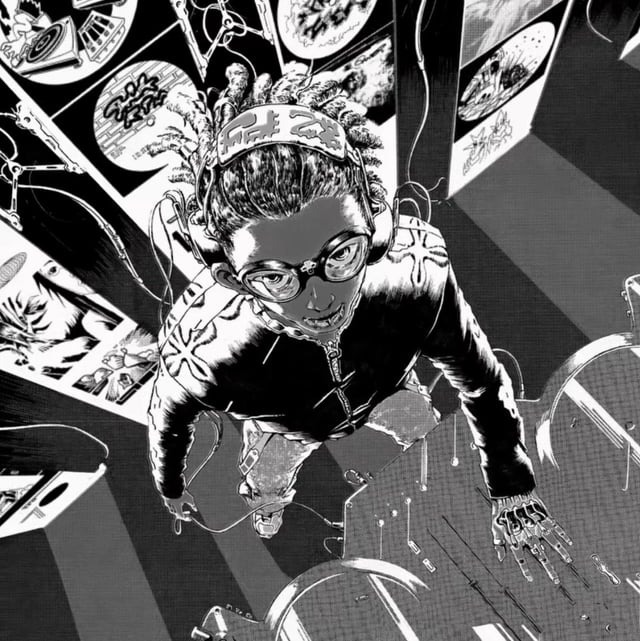
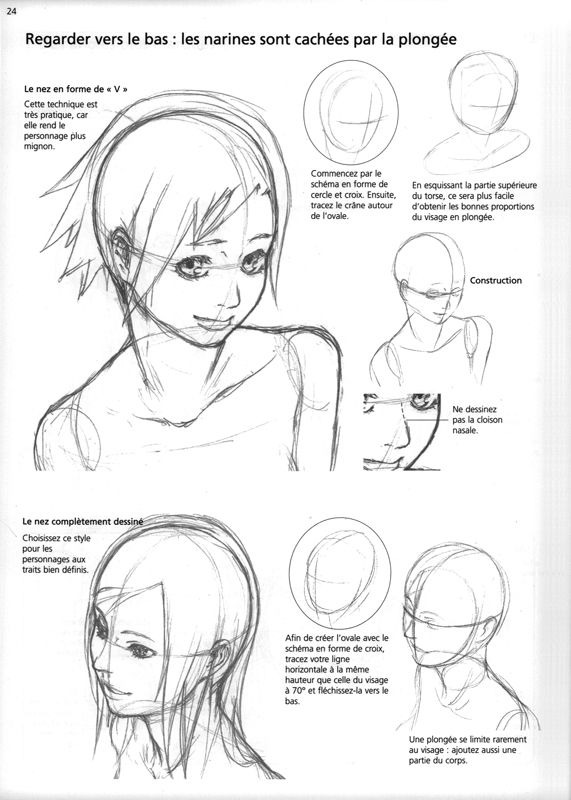
Turning the head left or right changes which sides of the face you see. Looking up or down changes which surfaces face the viewer and how the brow and center guides curve. With an upward tilt, more of the underside of the nose and parts of the chin or jaw become visible. A downward tilt changes how the forehead, brows, nose, and chin relate to each other.
MediBang Paint's Aori tutorial demonstrates an upward-facing manga face with curved eye guides and a more visible nose underside. Whichever way the head tilts, the facial surfaces should agree with it, and the hairline and bangs should follow the orientation of the skull, even when loose hair lifts away from it.
Why your 3/4 manga face looks wrong and what to fix first
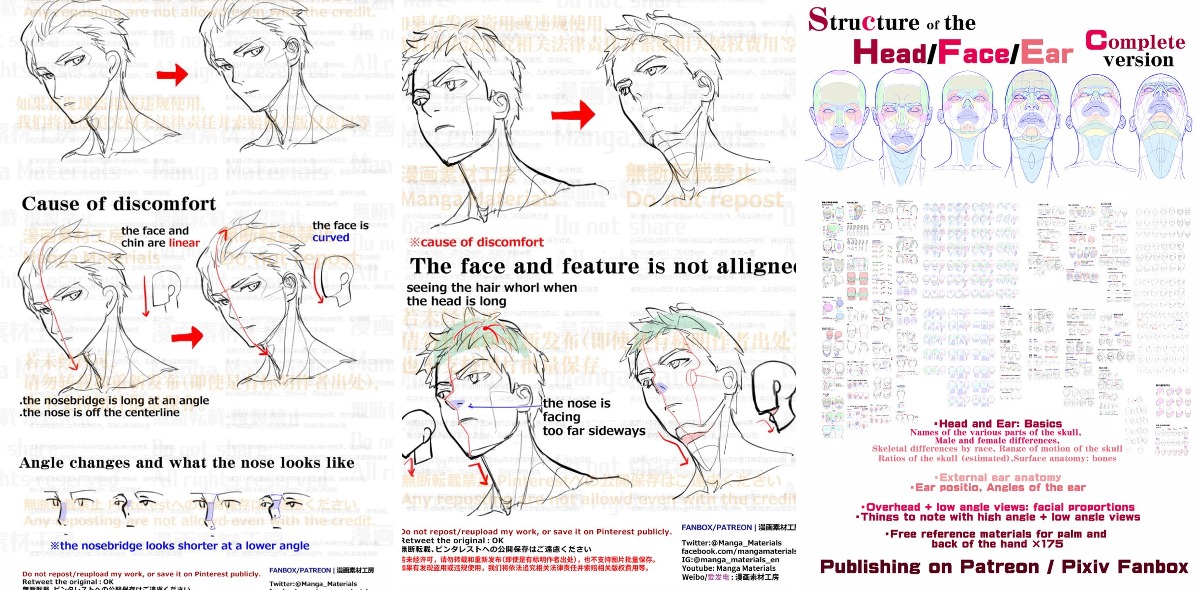
When an angled manga face looks wrong, find the first part of the construction that stopped agreeing with the head's direction. A mistake in the overall form can make several correctly drawn details look misplaced.
| What looks wrong | First part to inspect | First correction to try |
|---|---|---|
| The 3/4 face looks flat | Side plane and centerline | Reestablish the direction of the head |
| The far eye looks copied from the front | Far-eye visibility and shape | Adjust its apparent width or overlap |
| The chin feels detached | Jaw connection and centerline | Reconnect the lower face to the rotated skull |
| The ear seems too far forward | Side-plane position | Move the ear onto the correct head surface |
| The hair appears front-facing | Hairline and skull volume | Turn the hair mass with the skull |
| The profile resembles another character | Original design reference | Restore the intended defining traits |
| The upward-facing head looks flat | Brow and nose/chin surfaces | Adjust the features to match the head's pitch |
Separate a structural mistake from a detail mistake
A far eye that looks too large invites you to redraw it again and again, changing its shape each time. The design of the eye is fine, though. Its visible space is wrong because the facial plane has turned, so the correction belongs to feature placement.
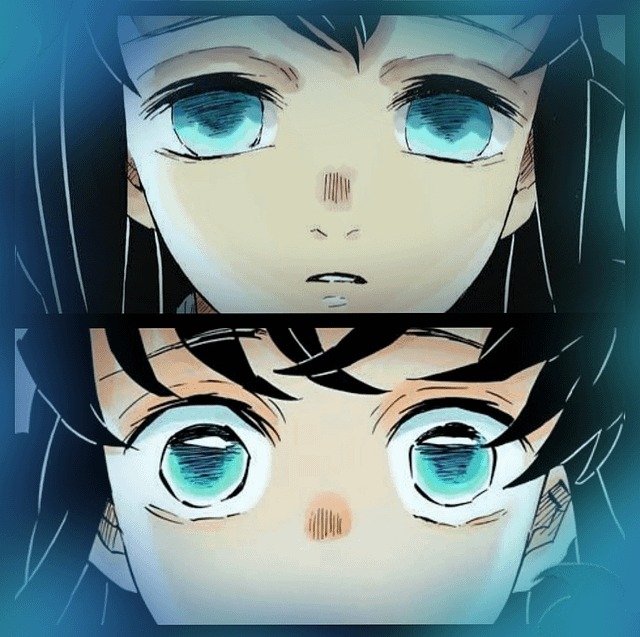
On the example character, a pointed chin that has turned round in the three-quarter drawing is an error of character identity when the skull, centerline, and jaw all face the intended direction. Restoring the pointed design fixes it without changing the head turn. If the chin no longer connects to the rotated jaw, the construction needs the correction.
Hair misleads too. An angled face can have a believable jaw and eye arrangement while its bangs keep the alignment of a front-facing head. The result feels inconsistent even though the facial proportions look reasonable.
To troubleshoot, work on a copy of the sketch. Mark the part you suspect first (the side plane, centerline, jaw connection, or the space a feature occupies), then draw one corrected overlay. Change one relationship at a time so you can compare the results.
Practice one head turn without copying the finished drawing
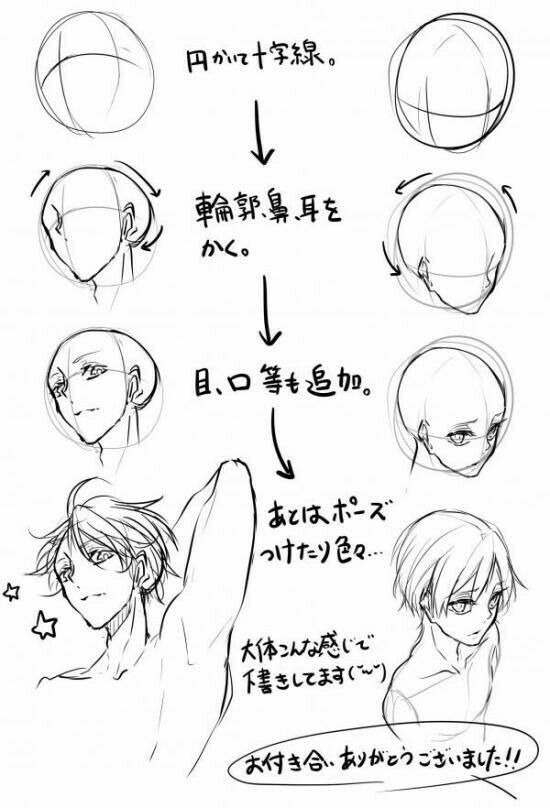
Use the example character and its three-view reference, with its design decisions fixed, and pick a slight turn between the front view and the three-quarter view shown above. Construct a viewpoint the finished examples don't show.
Draw a new angle and check the result
- Hide the finished examples. Keep the character's defining traits handy as a short design reference, but cover the completed head positions.
- Construct the new viewpoint. Draw the skull, side plane, jaw, and curved facial guides before adding the eyes, nose, and mouth.
- Restore the reference. Compare your attempt with the nearest view and, if you have one, a physical or rotated 3D head reference. Look at where the head points, whether the jaw connects to the skull, how much of the far side shows, and whether the character's traits survived.
- Identify the first mismatch. Pick the earliest structural discrepancy and leave unrelated details alone for this pass.
- Correct and compare again. Make that correction, then see whether the head and features now agree on their direction.
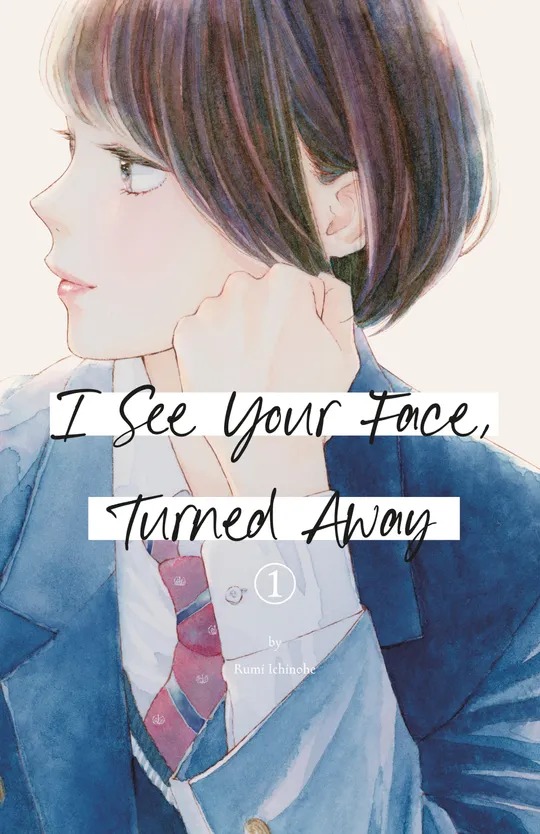
Proko's visual-memory assignments include drawing from memory, changing an object's viewing angle, and a third game that combines both tasks. This exercise applies that combination to a new manga head turn.
A good result is a new angle with a coherent skull, jaw, facial guides, and recognizable character features. It needn't be polished.
Keep the rough version beside the corrected one. The difference shows what you changed, such as a misplaced chin or a far eye that shows too much.